Defend Your Garden Against High Winds

Strong gales and storms are a fact of life over the British winter, and sometimes in summer. They can do plenty of harm to your garden, from ruining your plants to weakening trees, but putting some simple precautions in place can help minimise the damage.

Have a Robust Shed

One of many reasons to have a garden shed is to have somewhere to put tools and equipment during a storm. Don’t skimp on quality, since buying a good-quality shed can make all the difference.

Check that you have roofing felt to weatherproof your shed, and replace anything that’s split or worn. Also, ensure you can securely lock the door during a storm — this will help deter burglars, too.

Secure Your Fences

Your fences provide some protection from strong wind, but they’re also vulnerable to it. Paradoxically, your fence will actually be stronger if it has gaps the wind can blow through, reducing the pressure.

Treat wooden fences regularly with stain or preservative as protection against rot or insects. Don’t forget the posts, either. The buried part is especially vulnerable to rot and can bring the whole thing down if you don’t maintain it.

Trees Pose a Risk

If you have trees in your garden, a storm can snap branches off or even blow the tree down, causing damage or injury. To avoid this, keep your trees well trimmed, removing weak branches. It’s not a good idea, though, to top trees or remove substantial branches, as this can weaken it and leave it more vulnerable.

Instead, prune your trees, especially young ones. This reduces the bulk and, as with the fences, makes the tree safer by allowing more wind through. Trees should be the first things you inspect for damage after a storm.

Make Your Plants Safe

Wind can dry out, damage or even uproot plants. You can reduce the risk by putting up mesh or netting windbreaks, supporting plants with canes and wrapping containers in bubble-wrap. If you feel you need something sturdier, you can get a growhouse or coldframe.

Check that no stems or branches are crossing, which can cause damage, and ensure your plants are well watered before the storm. Any plants in pots should be placed against the side of the house.

Make Your Garden Secure

Before the storm arrives, any tools or equipment that can be brought inside should be put in either the house or the shed, and the shed door secured. Equipment and furniture that can’t be moved should be well weighted down.

You may still suffer some damage, but it can be considerably reduced by following these tips.

If in doubt please don’t hesitate to contact our trusted and reliable handymen on 0800-0 12 12 12.

Fitting a Letterbox or Catflap in Your Door

letter-boxFitting either a letterbox or a catflap — which are similar processes — should be quite possible for a skilled DIYer, although it’s obviously important to be careful cutting holes in your front door. Anyone unsure of their skill should consult and request the services of our skilled handymen at Handy Squad.

Fitting a Letterbox

When you know the letterbox’s size and design, establish the position to centre it by measuring the depth of the door’s cross rail in two places and marking the mid-point. Using these two points, draw a straight line right across the door, and then measure and mark the exact mid-point of the line.

Place your letterbox centred directly over this point and mark the positions on each side for the fixing bolts. Drill clearance holes, making them slightly larger than the bolt shank, then mark out a rectangle to cut out that’s slightly bigger than the flap.

Drill a hole at each corner big enough to take the blade of either a powered jigsaw or a padsaw and use the saw to cut around the marked rectangle. Cut recesses for the hinge-pin with a mallet and narrow chisel, and smooth the edges.

Fit the letterbox using the nuts provided and cut off any excess length on the bolts with a hacksaw. It’s a good idea to also fit an interior cover, since this will help keep out draughts.

Fitting a Catflap

If letterboxes vary in design, catflaps vary even more, with some of the more sophisticated programmed to open when the particular cat’s collar comes close. It’s essential to read the instructions and follow them to the letter.

The exact position for the catflap will depend on how your cat will use it. Once you’ve decided this, position the supplied template on the door and tape it on, making sure the tape will be easy to remove. When you’re certain the position is right, drill a hole of at least 8mm at each of the four positions shown, big enough to get the blade of your jigsaw or padsaw in.

Remove the template and draw ruled lines between the four points. Cut out the section along the lines you’ve made with a power jigsaw or a padsaw, and smooth the edges.

Hold the catflap up against the door in its place and, once you’re satisfied it’s level, drill clearance holes for the screws. Hold the two parts of the flap securely in place on either side of the door and fix each screw through the clearance holes, fastening the two parts together. Check that the flap can swing freely, and you’re finished.

How to Assemble Garden Furniture This Summer

garden-furnitureWe’re promised a good summer this year, so the chances are many people will be looking at their existing garden furniture and deciding they need to replace it. That’s all very well, but there’s a fly in every ointment. With garden furniture, it’s having to put it together.

Garden Furniture Assembly

Unless you’re buying something high-end and bespoke, garden furniture normally comes as flat-packs, and that can cause problems. Even if no parts are missing, and even if the instructions don’t look like something produced by a thousand monkeys with keyboards, garden furniture assembly can be anything but intuitive.

No-one could be blamed for getting a handyman in, not only to avoid the hassle but also to make sure you don’t ruin furniture you’ve paid good money for. If you feel up to tackling it, though, following a few simple principles can save you a lot of frustration.

Essential Preparation

  • The first thing to do when you open a flat-pack is to lay out all the parts and check them against the list in the instructions (including counting screws). If something’s missing, don’t attempt to start assembly.
  • If the pack includes non-symmetrical parts (e.g. the right and left sides of a chair) identify which is which.
  • Make sure you have all necessary tools to hand before you start the process.
  • Find a space with a flat surface and big enough to work in comfortably.
  • Make sure you have enough time to finish. If you have to come back to it later, there’s a risk something will have been lost.

General Principles of Assembly

The exact procedure will depend on which item you’re assembling (e.g. table or chair), the material (e.g. rattan, metal or plastic) and the manufacturer. Here are a few general principles, though.

  • Always stick to the order the instructions recommend — there’s a reason for it.
  • Place the item so that you can get at the connections most easily. For instance, a table would normally be assembled upside-down.
  • To minimise damage, leave any protective tape or other materials in place until it’s essential to remove it.
  • Don’t fully tighten screws or bolts till assembly is close to complete, since it may make it harder to fit other screws or bolts in.
  • Use every piece provided — it’s there for a purpose.

DIY or Professional?

If you work sensibly and methodically, you should be able to assemble your own garden furniture. If you just want it done and on your patio and you’re looking for a London handyman to oblige, Handy Squad can have your garden furniture assembled in no time.

How to Bleed a Radiator

Radiators need to be regularly bled of excess air or gas to ensure they’re performing to maximum capacity. It may seem the wrong time of year to think about your heating system, but sorting it out now will ensure your radiators are ready for use when you switch them on again.

You may prefer to have this done by professionals, and if you’re looking for London plumbers or a handyman in London, Handy Squad would be delighted to help. It’s quite possible to bleed your own radiators, though, if you follow a few simple steps.

Bleeding your Radiators

1. Turn on your you heating system and wait until all your radiators have fully heated up. Unless you’ve built up the pressure inside, the air won’t come out when you open the valve.
2. When your radiators have been on for a while, check each one individually to find out if it’s heating up properly — but be careful not to burn yourself. Cool spots are most likely to be found near the top of the radiator, marking where there’s a build-up of air or gas.
3. Radiators with cool spots need to be bled. Turn off the heating, so you can carry out the process safely, and find the valve at one end of the radiator.
4. You’ll need either a radiator key (available from any hardware shop or DIY store) or a flat-blade screwdriver. Either fix the key to the square valve, or insert the screwdriver into the groove.
5. Have two cloths ready, one to hold the key or screwdriver, the other to catch any water that escapes. Turn the screwdriver or key slowly anti-clockwise. If you hear a hiss, that means the gas is escaping.
6. When the gas is all gone, water will start coming out — usually a dribble if you’ve used a key, or a spurt if you’ve used a screwdriver. Turn the valve clockwise immediately to close it.
7. Look at the gauge on the boiler to check pressure. If it’s low, use the “filling loop” to fill up — this will be a lever or tap on your boiler, and should be clearly marked in the manual.
8. Repeat steps 1 and 2 to make sure all air has been eliminated.

Make Your Heating Efficient

Bleeding your radiators will make a big difference to the efficiency of your heating system, but there are other things you can do, from putting insulation foil behind your radiators to buying a radiator booster. If you need assistance with any of this, Handy Squad offers help with plumbing in London.

How To Put Up Pictures

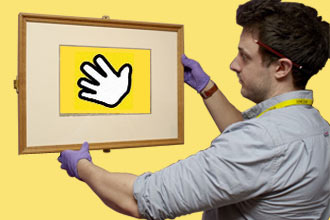
hanging-picture-thumbnailBefore hanging a picture on a wall you need to consider how large and heavy the picture is. This will determine whether more than one person is needed. Will a ladder be required and, if so, will someone else be needed to hold it in place?

Does the picture have hanging wires or hooks on the back that are capable of holding its weight? If not, then the appropriate fixings will need to be sourced and fitted.

What sort of wall is the picture to be hung on? This is crucial, particularly in the case of a heavy picture. Plasterboard walls are often not strong enough to hold heavy items. The fixings can simply tear out of the wall. The wall may therefore need to be reinforced. The type of wall will also dictate what sort of equipment you need.

For a standard size and weight of picture on a plasterboard wall, a hammer and nails/picture hooks should suffice, although a screw and rawl/wall plugs may be better in some cases.

For a brick/harder wall, a drill with masonry bits will be required to fit screws and rawl/wall plugs. Plastic pin hooks are very easy to hammer in, but ensure that you have enough of them to hold the weight (it should indicate this on the packet). The danger with these is that, over time, the plastic hooks can dry out and simply snap off. Finally, if the wall is concrete (every handyman’s nightmare!), an SDS/pneumatic drill (concrete drill) will be required to get those screws in.

Positioning the picture is crucial. Whilst we obviously will hang the picture where the customer wants it, there are factors the handyman must consider that the customer may have overlooked:

For example, are there any electrical sockets or light switches that would be affected / obscured by the intended position of the picture? You must also check what is inside the wall you are about to drill into. Wires and pipes should really be situated in the middle of a partition wall but not always, so it’s best to err on the side of caution.

Check the other side of the wall as well just in case, particularly if there is a shower or other appliance mounted on it. You can buy a wire detector (around £20+) which you just run across the wall and it will bleep to let you know where the wires are. Some will also indicate where the studs (wooden structure behind the wall) are located. Screwing into the studs will provide much more strength than just going into the plasterboard which is relatively flimsy.

So there you are, there is more to hanging pictures than meets the eye which is why we are called out to do it for our customers every day.

A New Handy Squad Website Launches

Handy Squad has been in business since 2005, and over the years the standards of website design have changed quickly. Our old site has served us well, but now we have a brand new website, as easy to navigate on a mobile device as more traditionally on a desktop or laptop.

Some things haven’t changed, though, and the site is still instantly recognisable from our characteristic yellow theme, with images of our familiar yellow scooters everywhere.

Home Page

The first thing you’ll find is the Handy Squad home page, welcoming you to the website with a brief introduction and an attractive animation. All pages feature an easy-to-use navigation bar and links to our phone number and an online booking form, while the home page also offers easy links to our main services.

About Us

The About Us page introduces us, and the navigation offers a variety of information. You can read a brief overview of the company and information about our squad of handymen, as well as details of the areas of London we cover.

You can look at the glowing reviews our customers have given us, while the Tradesman of the Month feature highlights one of our handymen each month. Meanwhile, this blog can be reached from About Us as Latest News.

Services

Available either from the navigation bar or from the home page, the six Services pages are the meat of the website, explaining the various types of jobs we do. Each of the pages — Handyman, Carpentry, Decorating, Electrics, Plumbing, Jet Washing — is further divided into the subcategories of jobs we offer.

Under Carpentry, for instance, you can read more about how we can help you with Cupboard Doors, Flooring, Hanging Doors, Kitchen Units, Partition Walls, Sash Windows and Shelves. Each page is broken down in much the same way, so you can see exactly what your options are.

How It Works

The How It Works section is divided into The Handy Squad Process and the FAQs. The former gives a clear, logical break-down of exactly what you can expect when you hire a Handy Squad handyman. In the FAQs, on the other hand, you’ll find all the questions and answers you’re likely to need. If it isn’t elsewhere on the site, it’ll probably be in the FAQs.

Prices and Contact Us

The handy man prices page gives a straightforward table of our rates for a handyman, an electrician or plumber, whether regular or out-of-hours, while Contact Us lays out every way you can get in touch. So why not use it now to ask for a quote?

Upsizing, Downsizing or Moving Office? Contact Handy Squad for Help


No aspect of business should stay still, and that includes the office space it needs. You may need more space to cope with all the new work you’re getting in. On the other hand, you may realise you don’t really need all the space you have, perhaps because you’ve outsourced some of your admin tasks. Or maybe the offices you’ve been using simply aren’t good enough, so you need to move.

It can be a lot of work to do it yourself, taking up time you should be using for doing actual business. That’s where we can help.

Moving Office Furniture

Office furniture can be heavy and rearranging it daunting, especially if you’re not used to lifting and carrying. In fact, you could be in trouble with health and safety laws if you ask your employees to do this without first providing adequate training on manual handling.

Whether you’re bringing in extra furniture, rearranging what you have, or organising items a removal company has taken between locations, Handy Squad’s trained handymen can do it quickly and efficiently, with minimal disruption to your staff and their essential work.

Expanding and Organising

Whether you’re expanding your existing office space or moving to new premises, you’re likely to need new desks, workstations, chairs and cabinets. If they’re delivered intact and ready to use, well and good, but in practice much of this is likely to come as flat packs. They can be fiddly and time consuming to put together, and that’s the last thing you want. Instead, we can assemble any flat-pack furniture you have in record time.

You may well also need more shelving. We can do the whole job, from measuring and cutting the shelves to size through to putting them up and painting them, all while your staff are getting on with their jobs.

Any modern office has plenty of electrical equipment, from computers to air conditioning, and those trailing wires can be a menace. Our handymen can hide your cables using trunking, or even bury them in the walls. We can also carry out a Portable Appliance Test (PAT) on your smaller equipment to ensure it’s safe.

Our Handymen

Our handymen are smart and uniformed, so they won’t lower the tone of your office if a client visits while the work’s going on. Work can be pre-arranged to suit your needs, or you can use our same-day call out for one of our general or specialist handymen. Call us to find out how we can help you.

This Is a Job for the Caped Handyman

A handyman can be like a super-hero, riding his trusty scooter to rescue all those overwhelmed by household jobs. But our latest recruit, Charlie, has taken it further. Charlie has a secret identity as a crime-fighter.

Holy Martial Arts!

Well, it’s not really such a secret, and Charlie doesn’t go out deliberately fighting crime Batman-style, although he’d be well equipped to deal with a situation if he happened to come across it. What he does is train people to defend themselves against attack.

Charlie co-runs a group called Urban Escrima, using an ancient combat system from the Philippines as an set of effective self-defence techniques. Escrima covers both armed and unarmed combat — using wooden staves for the armed part — and emphasis is on defending yourself (or someone else) against armed attack. The techniques can even be used to neutralise and disarm someone coming at you with a knife.

With Great Power Comes Great Responsibility

Charlie doesn’t treat Escrima as a sport. Sparring to test your strength is all very well, but his mission is to help people protect themselves out on the mean streets, and what he offers is combat training, not the chance to win competitions. You have to fight seriously, and while you’re in a session you can find yourself attacked when you’re least expecting it — just as it would be out on the street.

He goes all over promoting Escrima, too. In 2013, for instance, he was one of the main guests at the Vegan Fight Fest in Warsaw, demonstrating his techniques to a world-wide audience.

The Mild-Mannered Handyman

Clark Kent is a mild-mannered reporter and Bruce Wayne is a millionaire philanthropist. Charlie also has a daytime identity, but there’s nothing mundane about what he does.

As a handyman for the Handy Squad, Charlie travels around saving people from inappropriate DIY. Expert DIYers are fine as a rule, but many people create a fiasco when they try to decorate their homes, or destroy a flat-pack trying to assemble it. More seriously, they may even risk burning or flooding their homes by meddling with the electrics or plumbing.

Charlie is one of a dozen intrepid handymen who spend their days offering expert skills for all these jobs and more. Decorating, carpentry, tiling, plumbing, electrics — you name it, the Handy Squad do it.

Defending homes by day and helping people to defend themselves from criminals at night — that’s a bit like Batman having a secret identity as Superman.

Spring Clean Your Garden with Jet Wash Services from Handy Squad

Winter can be unkind to your garden. Quite apart from most of your plants being dead or sleeping, the paths, patios and steps that looked great in the summer have had dead leaves blown across them and dirt washed over in the rain. By the time the garden’s waking up for spring, what was gleaming stonework is likely to be looking dingy, and your garden furniture could be the worse for wear, whether it’s been out for the winter or stored away somewhere.

Handy Squad can turn your drab winter garden back the way it was with a thorough jet wash.

Paving Stones

Paving stones, whether a patio or a path, look great when they’re first laid, showing up brightly against the green of your garden. Unfortunately, they can easily get dirty, with dirt getting not only between the stones but into the tiny cracks and crevices in the stones themselves. You’re also likely to find unsightly weeds growing up between slabs.

Handy Squad can jet wash your paving stones, the high-pressure water scouring out dirt from the tiniest crack and shredding weeds. It’ll also wash away any loose grouting from between the slabs, and if this has crumbled too much, it could be time to have your paving regrouted. Handy Squad can remove broken grouting and insert fresh cement in the gaps. Not only will your paving look fresher, but the new grouting will also prevent weeds from growing for several years.

Stone Steps

The last thing you want is for your steps, front or back, to cause accidents. Unfortunately, stone steps are prone to just that, since a barely visible layer of moss can grow over the surface, which is slippery when it gets wet. Even if they seem clean, it’s as well to regularly have your stone steps jet washed, to make them safe.

Garden Furniture

If you have wooden garden chairs or tables, they’re likely to get dirty, and they may suffer some rot on the surface. Jet washing your garden furniture cleans out the dirt and any small pieces of rotten wood from the fibres, leaving them almost like new.

To preserve it in its new state and make sure it’s longer till the next jet wash is needed, Handy Squad can treat your wooden garden furniture with wood oil after cleaning. The oil protects the wood against whatever the weather throws at it, as well as prevents it from rotting. If you have the full service, you’ll be extending the life of your garden furniture.

Contact us for more information about our jet washing services.

Do You Have a Schedule for Office Repairs in London? (18 May 2015)

Any business premises needs to be kept in tip-top condition in order to send out the best possible message to your clients and contacts when they visit. Any maintenance requirements or Office repairs in London should be seen to as quickly as possible in order to avoid the cost escalating – things that are left will only get worse. It is a great idea to ensure that there is one person in your firm who is responsible for overseeing the office repairs and maintenance, and they should have an annual schedule which will help them plan ahead. Here is how to build your schedule for office repairs in London.

Talk it through

The first thing you should do when writing your maintenance schedule is talk it through with someone as this will help you to focus your thoughts. Write a list of annual, monthly and bi-monthly jobs that need doing together and start to build the schedule so that no major works occur at a time that will be disruptive or inconvenient to the firm. Note any current maintenance needs so that these can be addressed within the schedule.

Draw it up

Once your maintenance schedule is decided, you will need to draw it into a list so that you can plot which jobs should happen at which time of year. Of course there will be the unpredictable and ad-hoc jobs that need doing too, so make sure you build in time to take this into account. Some jobs are best done in the winter while others are best carried out in the summer so take time to decide on this.

Plan ahead

Once your schedule is sorted you will be able to plan ahead which should hopefully mean no nasty surprises. Being able to plan works long in advance means that you have plenty of time to think the work through and also to find the best price for the work.

If you need help with your office repairs in London then there really is one name to call. The Handy Squad are able to handle all of your office repair requirements from your plumbing and electrical needs right through to large-scale building works. Visit our website to find out more about the services that they offer.